• Home
    • Van Life
    • Cycling
    • Hiking
    • Sweden
    • Product Reviews
    • Events
    • Fitness
    • OCR
    • Running
    • Guest Posts
  • About
    • Who Is The Person Behind Fat Girl Fit?
    • Privacy and Cookie Policy
  • Collaborations
  • Interviews
  • Get in Touch
    • Facebook
    • Instagram
    • Pinterest
    • TikTok
    • Twitter

Fat Girl Fit

Be fearlessly unapologetically you

Category: Cycling

Top tips on how to survive multi – day riding

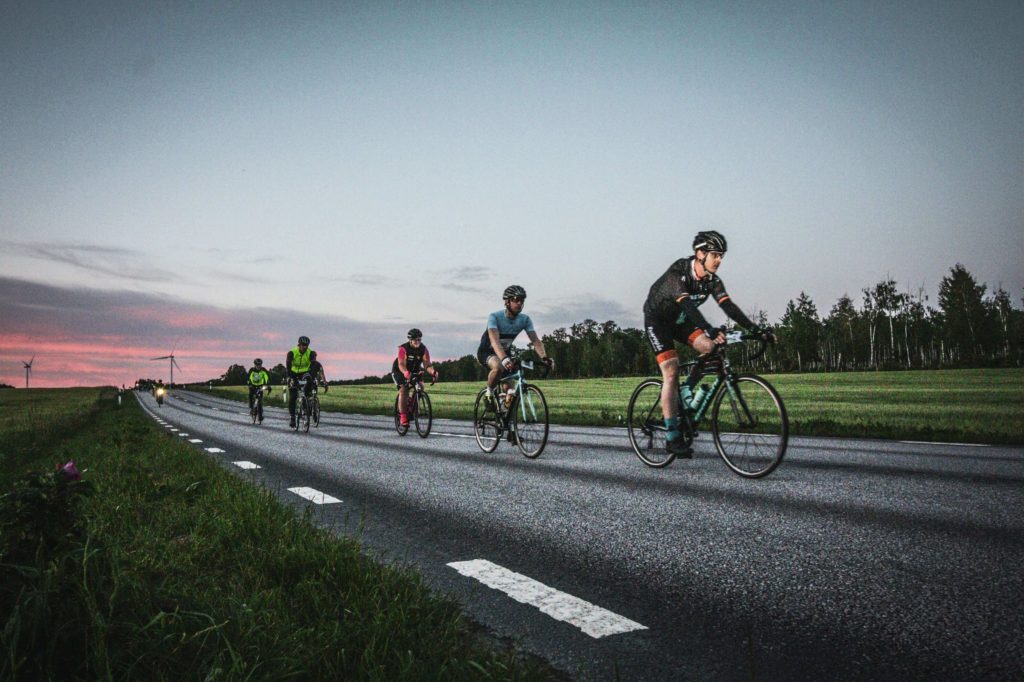
Multi day and endurance cycling events can be daunting.  Long periods of time in the saddle and overall distance can easily become overwhelming.  This could be an event that starts on one day and finishes on another in one stage or could be multiple days over a certain time like on a training camp, cycling holiday, personal challenge or multi stage event.

Training Plan

From my experience training correctly is key and this should be structured with your specific goals in mind.  My training plan would be varied and include rides that are:

  • endurance – flat or rolling course, boost muscular endurance, aerobic fitness and fat burning zone.  These rides will also build up your experience of spending multiple hours in the saddle.
  • interval work – short periods of high intensity.  Turbo sessions lend themselves better for interval sets too with no interruptions or obstacles found when out on the road.  Turbo trainer sessions are great for following structured plans.  I use Zwift and complete the dreaded FTP test.  An FTP test scores your functional threshold power and this determines your ability to sustain the highest possible power output.  Once you have completed this it means sessions you follow will then be geared around your FTP and more tailored for your ability.
  • hill climbing – to get better at hills you must practice on hills, it really is that simple (and I am saying this as much to myself as everyone reading this).  Hill climbing on the bike also helps with improving muscular endurance and strength.
  • recovery rides – recovery is part of the process and allows muscles to repair.  A recovery ride would be otherwise known as active recovery but should be done so at an easy pace.  If you use training zones think zone 1 or 2, super easy, more than comfortable and conversational pace.  I have written a blog post on this in more detail that you can read here.
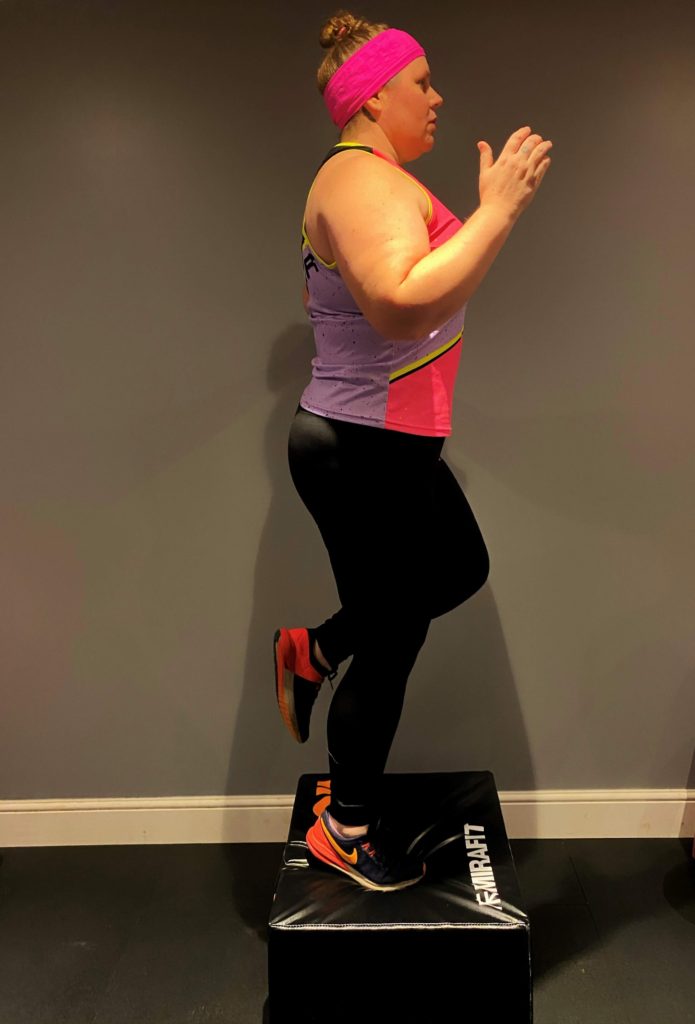
  • strength and conditioning with a focus on leg and core strength, essential when on the bike.
  • yoga to ensure stretching – it really helps!
  • sleep – I always try and get 8 hours per night, key time for your body to rest and repair and make you feel more energised.
  • I train off cadence though many others train using heart rate or power, and this is personal preference.  Cadence is the number of revolutions per minute of the crank arm and gives a natural feel when riding to indicate when gear changes are required if cadence is too high or low.

Other Considerations

Multi-day riding is different to a single ride regardless of length as you will need to get back on and do the same in a sequence of days.  Riding on back to back days will help to build stamina.  If an event is over more than one day you should absolutely be training for this and simulating the same sort of scenario in your training.  If you find after one long day in the saddle you struggle to ride the following day this would be an area to focus on for multi day riding.

Building up mileage gradually over time is important because a sudden increase in mileage can not only increase risk of injury but you will probably see less progression also.  Build a strong base and then build on that gradually.  I wrote a post when I was training for a 300km bike ride that you can read here.

When spending many hours in the saddle you want to ensure some comfort and I cannot personally vouch for the importance of a bike fit enough.  The smallest of changes can make the biggest of differences.  I have written a blog post with more detail on this that can be read here.  Don’t let the overall goal overwhelm you.  Break it down ie rest stop to rest stop as necessary, work out food stops as an example.

Fuel correctly as this really can make the biggest difference when riding! Don’t try anything new on event day(s) and instead stick with what you have tried and tested during your training.  You should know by then what works for you and stick with that.  The key is what works for you – people will try and be helpful and they very well might be but what works for one will not necessarily work for another so be selfish and do what is right for you.  I have a timer on my bike computer and every 20 minutes it will alert me to eat and drink and I have found little and often works for me.  Being properly hydrated is essential and a carbohydrate/electrolyte drink is great for endurance events and performance.  The only thing I might change relating to fuelling would be depending on the weather for example if I knew my ride would be in hot weather, I would ensure my fuel was nothing that would melt and could withstand the heat.  I would also take extra sachets of my energy drink and possibly salt tablets to replace salt lost through sweating (nice I know but this can really help).

Recovery at the end of the day will help, if an event with massages then a short rub down of muscles will be beneficial and if not stretch with a focus on areas you will have worked on the bike like hamstrings, quads, glutes, hips, back and groin.  Recovery shake to rehydrate and rebuild and repair muscle fibres ideally within 30 minutes of completing your ride for the day, and enough sleep ready for the following day.

I will always maintain you should trust your training – train smart with your goals in mind and when completing your event trust the work you have done to get you to that point and enjoy the ride!

Category: Fitness

Have Fun With Movement

Have you ever thought about how you move?

Previously I have said that I started blogging initially as part of a fitness and weight loss journey and I was in a routine where I would post on a weekly basis as an update with what weight I had lost on my ‘weigh in Monday’.  This soon turned into something that was quite toxic and left me feeling terrible about myself.  I also soon realised that was not what my blog was about and instead I turned my focus to being a healthier and happier me. The wording of my blog strap line changed from ‘An ordinary girl on a mission to get fit and lose weight’ to ‘be fearlessly unapologetically you!’ A blog post with more on this, can be found here.

With this change in mindset I found that I began to enjoy more the simple act of movement and being active in different forms whilst having fun with it.

Now don’t get me wrong, I feel I need to address this as I don’t want anyone to think I am being a hypocrite, I would like to lose weight.  There is nothing wrong with that (although I always fear being shot down when I say that).   But I can do so in a healthy and happy way.  Talking weight loss has become taboo and I actually wrote a blog post about that here, but my point is being active and movement should not be done with the sole focus of losing weight.

Have Fun!

For me I need to enjoy what I am doing and strongly believe we should never underestimate the importance of having fun.  My mindset moved from having to diet and exercise to lose weight, which ultimately made me feel worse about myself and instead focus more on movement that makes me happy.  It is what I love about going out on my mountain bike too – enjoying just being out and about on my bike, getting dirty, enjoying the fresh air, climbing across ditches with my bike, not worrying about my average speed and just enjoying the fun of it.  Why don’t we do more of what we love?

This image has an empty alt attribute; its file name is 38c80385-1b94-416b-bd4b-3d5e61fa9627.jpg

To have fun is to enjoy what you are doing and for it to bring you pleasure.  Once I took things back to being fun I found so much more enjoyment and I want to be active. My goals are still there but in between I enjoy my life.

A friend asked me once why I ran if I hated it?  Good question, I was running to get quicker, but why?  Soon I stopped chasing that goal of running quicker – I can run, I am not quick and that is fine.  Why was I in such a rush and in turn hating every single run I did?  Why not realise that the simple ability to move is a gift that some others do not have the luxury of and we should cherish that.  I ended up running with a couple of friends at local parks and veering off on trails, exploring the forests.  We would laugh and joke, jump trees, cross gates and bridges, run through streams and crawl through pipes and just enjoy being outside.  Arriving home I would be filthy dirty but had a huge smile on my face.

Diet Culture

Increasingly the focus within society is on what we can achieve through exercise and movement rather than the health benefits.  This leaves a feeling of working out to be a chore and something we don’t look forward to.  Movement is defined as the act of moving.  Looking at exercise as movement instead is more pleasurable.  Movement produces serotonin, a feel good hormone that your body will thank you for.

Diet culture also plays a part where we have it drummed into us to look a certain way, eat certain foods and this naturally warps the mainstream perception of what movement and exercise is.  To live like this encourages a very unhealthy relationship – be active, exercise and move because you want to and not because you ate a cake or a biscuit.  There are many quotes about doing an activity because you love your body and not hate it and it is very true – we don’t complete a workout to feel depleted, we want to feel energised and we should do so intuitively.

Have you ever felt increasing pressure to go bigger and better?  You run/swim/bike (whatever your chosen activity is) a series of distances that increase in distance but where does that stop?  The focus is always on getting quicker, going further, and that is fine BUT if that is not your goal then that is also absolutely fine.  You may have heard that phrase to compete or complete?  Both are fine, it just depends what your personal goal is.

Find what works for you and your body and don’t be as concerned with what everybody else is doing.

What Does Being Active Look Like To You?

The NHS have guidelines for adults aged 19 to 64 to complete 150 minutes of weekly physical activity.  This could be anything from working out in the gym, to walking, cycling or yoga and much more.  Choose what makes you smile.

For me being outside is key, I love nothing more than getting out on my bike or just being outdoors.  Our son is now 22 years old but when he was growing up we wanted him to love being outdoors too.  Children will follow the examples set by those around them and imitate what they see so it is key to remember that your influence can be hugely powerful.

So ask yourself how you move and if that brings you enjoyment and if the answer is no don’t be afraid to change and when you do, smile.

Category: Cycling

Gran Fondo Training Plan

I have just finished the Gran Fondo training plan on Zwift. This is my second training plan I have followed on Zwift; the other being the FTP Builder that you can read more about here.

Photo by Rich Maciver

So what is the Gran Fondo plan intended for? Well the objective is to build strength and endurance, whilst including high intensity interval training. When I was looking into the plans available the following appealed to me:

‘You’ll come away ready for long climbs, sustained efforts, and everything else a course might throw at you, thanks to this plan’s proven framework for success over long-distance rides.’

It was 8 weeks and each week had 4 sessions, which included the following:

  • long tempo intervals: intervals at 90% FTP intended to get you used to sustained power
  • low cadence intervals: now these I found so tough! I train using cadence and low cadence is not something I feel comfortable with. These intervals were as high as 97% FTP and as low as 55 RPM, when I usually sit at around 80-85 RPM so quite a difference and total leg burner!
  • progressive ramps: pretty self explanatory with intervals that progressively get harder and in addition each block of intervals getting harder than the one before
  • breaks: intervals that build to top speed and above threshold power with those breakaway sprints in mind
  • extended tempo: again with the focus on endurance and sustained efforts
  • sweet spot training: these always sound like they should be nice and comfortable and yet I find can be some of the harder sessions with most of your time being spent in 85% to 95% of FTP
  • tempo accelerations: steady endurance with sprint efforts
  • maximal aerobic power: intervals that are high power output, longer than a sprint but good recovery time in between efforts
  • over unders: my nemesis! I hate these sessions with a passion as they are always a killer. Unders at 80% FTP and overs up to 95% FTP, constant between these levels really test you mentally and physically.
  • long ride: these differed every week with each getting progressively longer in duration (the longest being 3 hours and 15 minutes). Each week had a different focus but each were intended to build endurance and included efforts to simulate conditions you may encounter when out on the road.
  • endurance free ride: I did my first two sessions of the week on a Monday and Tuesday and then used this ride as recovery to spin the legs ahead of the long ride at the weekend. You can also do this ride outside.

As I noted with the FTP Builder plan the Zwift companion app made it very easy to see how my plan was scheduled for the week and each session says when it will be available and you can click in to each to see what is in the session.

Every session completed then gets ticked off and you work your way through the weeks. I am one of those sad people who love to get my stars in a workout and so liked seeing the green tick when I completed a session too! Here are my stats from the end of the training plan:

So how did I get on? The longer sessions built up and that gradual increase definitely helped getting used to longer sessions in the saddle. With no natural movement on a turbo the longer sessions can be tough. My final session was 3 hours and 15 minutes and I managed to tick off my 25 volcano lap badge. Yes, 25 laps is as boring as it sounds but the efforts made it interesting. I also got my 100km badge too so triple win with final long ride ticked off and two badges!

I would definitely recommend this training plan if you are looking to work on your strength and endurance.

Category: Fitness

Looking Back on 2020

Where do we even start with this year? I half wondered if there was a need for a round up post but decided there was.

Needless to say it did not go as planned, but that is the same for everyone. Events were cancelled. Goals changed. It’s been emotional! But let’s focus on the positives.

When it came to my top 9 photos from the year, I was worried about it, but there are still so many memories, so I won’t focus on the negatives as there are too many smiles to do that!

2020 Best in 9 Photos

2020 Events

So pretty much everything got cancelled or deferred. However, some switched to a virtual format and so I did manage to complete the following:

  • Vatternrundan virtual 315km – yep that was it, but it is my favourite so I am happy with that.

2020 Training

My set up at home is great so I have been lucky in being able to continue training. This was definitely something I needed to add a bit of structure and normality, completing the following:

  • 6 week bootcamp course
  • 6 week tailored cycling plan for me
  • 6 week FTP Builder plan on Zwift
  • 8 week Gran Fondo plan on Zwift
  • the annual mileage goal I set myself
  • achieved 100 of the 137 badges available in Zwift

Other 2020 Highlights

  • multiple weekends away in our camper van – so good for the soul!
  • more time with family
  • more time with friends in our ‘bubble’
  • improved work/life balance
  • more time with the dog – actually a little worried how she will be when we do return to normal working days
  • took up MTB (definitely need practice on this)
  • had a number of gravel bike adventures (same note as the MTB above on this one)

2021 sees me as a Foher ambassador again and I could not be happier about that! The support from my Fohfam has been amazing, as always, but this year even more so. It is always nice to see so many in the virtual world – lots of kudos and riding together.

Like many, I have a number of events that have been deferred from this year so fingers crossed they take place.

Here is to an even better 2021!

Category: Cycling, Fitness

Plyo Box Exercises for Cycling Leg Strength

When it comes to cycling one thing you will most definitely want strength in is the legs!  Of course, there are other factors like a strong core as an example. However, you will find most people who cycle will incorporate strength work into their training for improved performance and injury prevention.   Cyclists will probably pay particular attention to leg day – your legs will thank you when it comes to increasing the pace or hill climbs.

This is where a plyo box can come in handy, but first what is a plyo box?  I first came across these in a CrossFit gym and it was made of hard wood and quite frankly terrified me.  You can, however, also get a ‘soft’ version made of high-density foam, which is what I use (much kinder to the shins)!

Below are 5 of the leg strength exercises I have been using the plyo box for to complement my cycle training:

Box Jumps

You can’t have a plyo box and not include a box jump exercise right?  Now if you are in the camp that is worried about crashing in to the box then I get you! Remember most people do at some point so don’t worry. Also you can start with the shortest side and work up to higher sides of the box when you feel more confident.

Start with feet under hips, bend into a partial squat and using your arms explode off the ground jumping to the top of the box, landing with soft knees also.

One legged pedalling

Bear with me with this one because it is a goodie!  A friend of mine (the lovely Laura – Specialized Ambassador) suggested this as an off the bike workout and yes it looks a little silly but it works.

Start standing on the plyo box with one leg acting as a support into a partial squat and the other hanging off the side to do a pedal stroke motion. This works not only the supporting leg but also the core, hip flexors and functional pedal movement.

Calf raises

Your calves are always moving when cycling and this exercise both mimics the movement and strengthens the calf muscles.

Start standing on the edge of the plyo box, feet should width apart, raise up on to your toes and lower back down in a steady motion.

Hip thrust

A must have move for glute development, which will pay off when sprinting or out of the saddle climbing but also helps with back pain too.

Start with the bottom of your shoulder blades pressing into the top side of the plyo box with your barbell resting on your hips, knees bent, legs together and feet flat on the floor. As you lean back and rotate your shoulders up onto the box you drive your hips up.

Single leg push offs

An exercise that targets quads and hamstrings.

Start facing the plyo box and put one leg up on the box then push off and jump in the air, landing on the same leg.  Repeat and switch with the alternate leg and also use your arms when jumping to help make the move more dynamic.  If you are not so keen on jumping you can do these by stepping and incorporate weights instead.

The plyo box I am using is from Mirafit and can be found here.  It has the 3 different heights of 16, 20 and 24 inches.

Happy cycling!

The plyo box was gifted but all opinions are my own.

Category: Fitness

Christmas Gift List Ideas

Being in a second lockdown I don’t know if you are like me but I love an excuse to shop online and not have to go out to the shops!

I think I will struggle a little this year thinking of thoughtful gifts for people as most of us have had such a jumbled year with everything that is going on. But, if you are a keen cyclist, like me, then here are some ideas for gift ideas to suit all budgets:

  1. Kettleboob resistance band for strength workouts – definite gains to be had from strength and conditioning sessions off the bike. £14.99
  2. NRG waxed chains – turn those waxed chains into extra watts! Full disclosure this company is owned by friends of mine but they know their stuff and I am a paying customer supporting their small business and have these chains not just on my road bikes but now also my MTB. Prices for chains range from £35 to £60 and other packages available too.
  3. AMWRAP fun fitness gifts – so many options from small gifts to clothing but I can personally recommend the Fuck Burpees jumper, because who likes burpees?!
  4. Spoke and Solace – cycle related clothing for men and women with the pink Giro jumper being one of my favourites, £48!
  5. Love Velo CC – more cycle clothing designed by the lovely Lucy Sturgess and a brand close to my heart promoting equality in cycling. I have many of their tshirts but I think my favourite is the Here For The Cake tee because we all love a good cake stop on a ride right!
  6. GCN Endurance book – new book from GCN by Mark Beaumont who is a long distance cyclist who currently holds the record for cycling round the world. This book gives guidance on all cycling aspects in relation to endurance riding. £16.99
  7. Jens Cycling Art- have you done an event or cycled a famous route and want some art to hang in memory of that? If so then check out the prints available from Jen that start from £25.
  8. BioRacer Winter Cycling Cap – they do say there is no such thing as bad weather just bad kit choices and with this winter cap you can’t go wrong. Thermal cap that covers not just the head but also the ears and part of the neck is a definite winner in my books. £45
  9. VeloPac – I have one of these following a recommendation from a friend and they are fab! Neat little case that is waterproof and holds phone, money/cards, keys to hold your essentials when cycling. From £20 on Velo Vixen.
  10. Dynamic Cyclist subscription – your one stop shop for classes/sessions/training available online or using the app for not just on the bike but also off the bike including stretching, mobility, yoga, strength, injury programming and more. $9.99 per month.
Follow my blog with Bloglovin
Category: Cycling

Different FTP Tests


Ah the dreaded FTP test! Lets start with what they are – an FTP test is a measure of your functional threshold power and can be used to determine increase/decrease in fitness but more importantly for training plans so you can be more efficient in your workouts and get the most from them. If you use an app, like Zwift, for training it will colour the intervals of a workout so you can see at a glance and they are as follows:

  • Grey – zone 1/recovery
  • Blue – zone 2/endurance
  • Green – zone 3/tempo
  • Yellow – zone 4/threshold
  • Red – zone 5/vo2 max, which is basically the maximum rate that the heart/lungs/muscles can effectively use oxygen during exercise

You know those workouts with all the red are the hard ones!

But there are different versions of FTP tests out there just to add a little confusion and what one should you use? Well I use Zwift and with that you have the option of the following:

Long FTP – starts with a warm up followed by three sets of short ramp ups to 130% and in between two easier leg spins a 5 minute effort before starting your 20 minute effort before finishing with the cool down. The power is measured by the average power from your 20 minute effort and then 5% is deducted for a more realistic result.

Short FTP – starts by getting your warmed up and slowly ramping in two sets of intervals up to 130% of your FTP, the first ramp being shorter and the second slightly longer but only from seconds to minutes. This is then followed by a lower effort leg spin and then your 20 minute effort and cool down. The power is measured by the average power from your 20 minute effort and then 5% is deducted for a more realistic result.

Ramp Test – 5 minute free ride and then you pedal at 1 minute intervals, increasing effort by 20 watts per minute basically until you cannot pedal any longer. The power is measured by your best 1 minute power and then 25% is deducted for a more realistic result.

Ramp Test Lite – basically the above but for those who weight under 60kg or who are newer to riding and has a slightly different structure with a longer warm up period and each 1 minute interval increases by 10 watts. The power is measured by your best 1 minute power and then 25% is deducted for a more realistic result.

I completed the long FTP for my first test and since then always stuck to the short but more recently I was advised by many to try the ramp test. I was also seeing a lot of commentary about the ramp test online with what seemed to be two camps – those who felt it was more efficient and less stressful on the body and those who still remained keen on the 20 minute effort. Anyhow, I had just completed a 6 week FTP Builder training plan and to measure the improvement I needed to complete a test and figured I would try the ramp test. Now I know I cannot do a direct comparison as the last was in a different format but it does still give a good marker.

I have always dreaded the FTP test so was actually keen to see how I felt after the ramp test and if it was the same. Yes it is a very intense short workout but the recovery is absolutely so much quicker! I was surprised how it started so low and so easy to getting a little tougher and then within 90 seconds I would say moving to oh no don’t think I can hold on much longer to not being able to move the pedals. It is definitely a test where cadence is key – find a good rhythm and try and stick with it – the second your cadence drops too much you will almost certainly not be able to continue! I actually laughed when I got a text box asking if I was done and I definitely was so was happy to click the ‘I’m toast’ button and it then gives your result.

The downside of an increase in FTP? All the new workouts are based on your higher FTP levels so in turn are tougher! Let’s finish on a fun fact to end on a lighter note though – my first FTP test (the long one) almost killed me and I was so ruined by the end of it I couldn’t unclip so stood up and lent forward and lost my balance and fell off my turbo. Yep I basically fell off a stationary bike!

Other top tips from me:

  • take a couple of days complete rest before completing your FTP – it is threshold after all so if you are fatigued then you will be putting your body under further unnecessary stress and this will affect the result also
  • make sure you are hydrated
  • keep up the cadence as it really does help
  • stay seated – these tests are designed to record power from a seated effort and although you will be able to get more power from standing you will also fatigue quicker and this will not help the result
  • remember it is all relative – we are all different heights, weight and have different strengths and weaknesses so don’t compare your FTP result with someone else as it is personal to you
  • lastly (and not really a tip from me but from a close friend) is that races help – I know a few people who race online and you will have a message displayed on screen if your FTP increases during the race so it is not just the tests that measure the power output and some do not test well but perform better when racing so that is also an option and helps increase the power too.
Category: Cycling

FTP Builder Training Plan

I am someone who likes/needs a bit of structure and so despite no events going ahead I wanted to continuing with my training and decided to do the Zwift FTP Builder plan. Now there are many training plans available on Zwift and you should take the time to look at what your end goal is a pick a plan to suit. I opted for the FTP Builder to focus on power and whilst it does say for those new to structured workouts, which is not me, the sessions looked to be in line with what I wanted. It is a 6 week plan and has 4 sessions a week with 2 of the weeks having an optional 5th session if you want. The sessions cover the following:

  • foundation: relatively low intensity ride with goal of spending a large proportion of the ride into endurance zone 2
  • strength: repeats of short and max efforts with the goal to increase muscle use and max strength
  • tempo: most time spent in zone 3 to help increases muscle glycogen storages that improves performance by being able to maintain the intensity
  • intermittent: includes short high intensity intervals with short recovery
  • threshold development: the toughest one that targets the increase in FTP with short intervals at intensity of zone 4
  • optional: 2 of these sessions where you can choose how hard or easy you ride

On my Zwift companion app it was very easy to see how my plan was scheduled for the week and each session says when it will be available and you can click in to each to see what is in the session.

Every session completed then gets ticked off and you work your way through the weeks. I am one of those sad people who love to get my stars in a workout and so liked seeing the green tick when I completed a session too! Here are my stats from the end of the training plan (I bloody love a bit of data):

Yes i know it shows 33/31 which makes no sense but that is because of the 2 optional sessions that I completed.

So how did I get on? Well obviously the only way to measure if it was effective is to compare my FTP result from before the plan to after and whilst the first test was the shorter FTP test and the second a ramp test so not a direct comparison there was a significant increase from 207 watts to 222 watts, that I was absolutely chuffed with!

If you are looking to work on your power I would definitely recommend this training plan – now I am taking an easy week and will start another plan next week – just need to decide now what one I do.

Category: Product Reviews

Rehook PLUS Product Review

You can mostly find me out and about on my bike and it doesn’t always go to plan. Like most cyclists I ride equipped in the case of minor mechanicals and punctures (the dreaded ‘p’ word) but secretly hope you don’t need anything from your saddle bag and the ride will be smooth sailing or smooth spinning.

I prefer to try and take as few items with me as possible and pack what I know is useful into my saddle bag . I wrote a blog post on what I carry in my saddle bag that you can read here.

When the lovely people at Rehook offered to send me their new Rehook PLUS product of course I said yes! So what is it? It is 11 tools in 1, which includes:

  • Rehook chain tool head – really useful gadget
  • 2x Tyre levers
  • 2x Spoke keys
  • 8mm, 9mm and 10mm wrench (I have nothing I could use these for on my road, gravel or MTB bikes so didn’t test these, but appreciate other bikes may have)
  • 5mm and 6mm Hex / Allen keys (I found that out of six bikes in our household these sized Hex tools only fit the bottle cages of two bikes. It doesn’t fit any of the brakes, cleats for SPD (MTB)/SPD SL, seat clamps, bike computer mounts or stems, which all required 4mm and I tested on road, TT, gravel and MTBs which are from three different brands. It did fit the crank arm bolts and the derailleur, however, if I had an issue with that I would be using a torque wrench and not this tool if I am being honest although I appreciate I would not be cycling carrying a torque wrench.
  • PH1 Phillips screwdriver

The first product from this company was the Rehook product, as seen on Dragons Den. This was marketed with the purpose of getting your chain back on without the mess and this product is an evolved version with additional features.

The Rehook PLUS is nice and compact with the tool dimensions being: 148mm x 28mm x 14mm and is also super lightweight weighing at just 60g. The strap that comes on the tool means you have the option of putting the tool in a saddle or bar bag, a tool case in a bottle cage and also strapped to your bike frame. I wouldn’t put mine on my frame, just personal preference, as I would be worried that through vibrations in the road it could lead to paint damage, and it is too long to fit in my saddle bag so when I’ve been riding recently I have put it in my jersey pocket.

There is no flat head screw driver piece, which could be useful although limited use on most bikes. I recently got an MTB and wanted to remove reflectors and some other pieces and used the tool but did need a flat head screw driver so thought this could be something for consideration.

Would be good to have a magnet under the Hex/Allen keys storage that you find under the tyre lever. I found when testing and using this that a couple of times they didn’t clip back in properly or fell out and a magnet would be useful to keep them in place. The insert to use the pieces does have a magnet in the bottom which is a nice touch. I would note once the tyre lever is in place they cannot fall out but it would be annoying to take the tyre lever out and them fall out, which was what happened to me a few times.

Rehook PLUS costs £26.99 with free UK shipping.

I was gifted this item but all opinions are my own.

  • « Previous Page
  • 1
  • …
  • 6
  • 7
  • 8
  • 9
  • 10
  • …
  • 36
  • Next Page »

Welcome to Fat Girl Fit!

Welcome to Fat Girl Fit!

Be Fearlessly Unapologetically You!

About me

  • Facebook
  • Instagram
  • Pinterest
  • TikTok
  • Twitter

Level 2 Qualified Coach & Commissaire

Foher Class of 2026 Ambassador

100 Women In Cycling 2021

Recent Posts

Learning Swedish With SFI Update

When In Sweden, It Would Be Rude Not To Fika!

A Day Exploring Visingsö By Bike

Search

Jag klarade mitt nationella prov i Kurs D 🎉 . I re Jag klarade mitt nationella prov i Kurs D 🎉.I recently posted about my SFI (Swedish For Immigrants) journey learning the language..So the learning path is Kurs A, Kurs B, Kurs C and lastly Kirs D.  In order to pass each level you have to pass four parts including listening, reading, writing and speaking..I recently did the National Tests for Kurs D and and pleased to say I passed 💙💛.Of course I need to continue to now put it into practice but pretty chuffed right now! .#swedish #sfi #fatgirlfit
Happy 2 year anniversary in Sweden 🇸🇪💙💛 . Well tec Happy 2 year anniversary in Sweden 🇸🇪💙💛.Well technically it was yesterday for me and today for my husband.  Wow that has gone quickly!.Now on to more adventures and continuing our Swedish journey 🥰.Tack Sverige för att ni har oss 😘.#sweden #livingabroadlife #fatgirlfit
It is really important to me if I choose to live i It is really important to me if I choose to live in Sweden to learn the language.  I wrote a piece on the blog previously and since then I have continued trying to improve my Swedish language skills..This largely with the Swedish For Immigrants (SFI) course, Duolingo and I’ve also started with @slowswedish_ which is fab 🇸🇪 although I cannot lie and I find it a really tough language to learn - my brain works in English and I struggle to get the grammar and word order..I’ve written an update on the blog about how it is going - link in bio 💙💛.#swedish #sfi #fatgirlfit
Sunsets and sunrises - I will always love the chan Sunsets and sunrises - I will always love the changing colours of the sky and those on Sweden always deliver 🌅.#sunset #sunrise #sweden #sunsets #sunriselover #prettysky #swedishsunset #swedishsunrise #fatgirlfit
On our holiday recently I swam in the sea! This is On our holiday recently I swam in the sea! This is huge for me as I am terrified of open water..If I can’t see in the water, I am not getting in..You never know whats in there - could be sharks 🦈 .But the water in Cyprus was crystal clear and although we did not see any turtles 🐢 we saw so many fish 🐠 and I loved it 💙 .#cyprus #protaras #cyprus🇨🇾 #seaswimming #swimminginthesea #snorkeling #snorkel #protarascyprus #holidayfeels #holidays #fatgirlfit
Holiday feels ☀️🏖️🛫🍹 . #cyprus #protaras #cyprus🇨🇾 Holiday feels ☀️🏖️🛫🍹.#cyprus #protaras #cyprus🇨🇾 #protarascyprus #holidayfeels #holidays #fatgirlfit

Copyright © 2025 Fat Girl Fit · Theme by Blog Pixie